Pantry Visibility: How to See Everything at a Glance
Food you cannot see gets rebought or wasted. Work through these fixes in order of effort: clearing, single rows, stepped heights, clear bins, labels and light.

Food you cannot see might as well not be there. It gets bought again because nobody knew it was on the shelf, or it sits at the back until nobody wants it. Most pantry frustration traces back to that one cause.
Pantry visibility is the principle underneath almost all organizing advice. Risers, clear containers, labels and single rows are different answers to the same question: can you tell what you own by looking? The fixes below run from the least effort to the most, so start at the top and stop when the pantry reads clearly.
Start by removing what blocks the view
The cheapest visibility fix is taking things out. Before buying anything, clear the shelves of:
- Items that are not food and have drifted in: bags, paperwork, tools.
- Food your household will not eat.
- Empty and nearly empty boxes that still occupy a full space.
- Outer cartons, once the packets inside can stand on their own or go into a bin.
A shelf that is three-quarters full shows its contents. A shelf that is completely full shows only its front row.
Stop hiding one thing behind another
Stacks
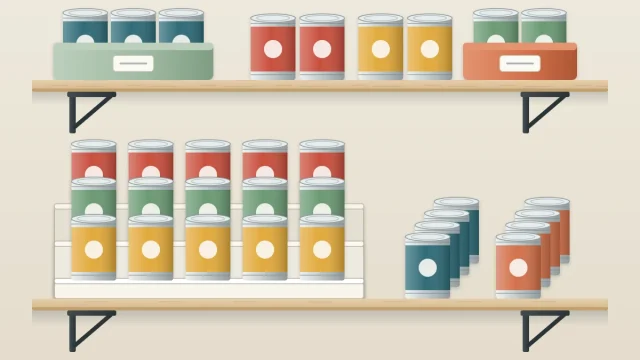
A stack is fine when every item in it is the same. Three cans of the same tomatoes, one on another, hide nothing, because the top one tells you what is underneath.
A stack of different things hides all but the top one, and getting the bottom item means unloading the pile. If a shelf has tall gaps that tempt you to stack, the better answer is usually moving the shelf or adding a half shelf, covered in the guide to pantry shelf organization.
Rows
The same logic applies front to back. Line up each item in its own row, one package wide, with identical packages behind each other. The front of the row then stands for the whole row.
The common mistake is a mixed row: soup in front, beans behind it, broth behind that. Only the soup is visible.
Step the heights
Where a shelf has to hold several rows of different small items, such as spices, small jars or single cans, raise the back rows. A tiered riser lifts each row above the one in front so every label shows.
You can get part of the effect with no equipment by sorting by height: tall items at the back, short at the front. Check it from where you normally stand, not from a crouch.

Choose clear over opaque, where it helps
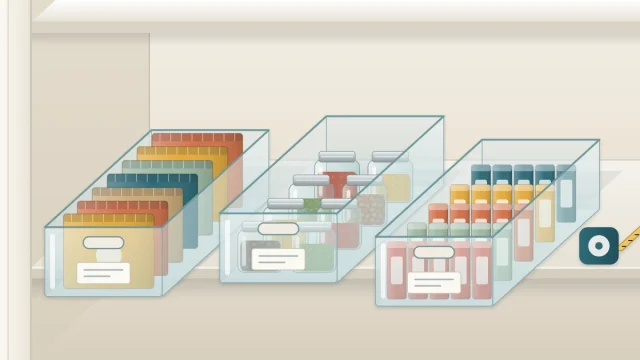
Clear containers and clear bins show what is inside and how much is left, which is the main reason to use them. For dry goods you buy repeatedly, such as rice, pasta and oats, seeing the level is a running reminder of when to restock.
Clear storage has a cost: it shows mess too. A clear bin of crumpled snack bags and half-used packets looks cluttered however tidy the shelf is. Some households prefer labeled opaque bins for untidy categories and keep clear ones for food that looks orderly by nature. Either choice works as long as an opaque bin is always labeled.
Tip
Before buying clear bins, try the idea with what you have: cut the top flaps off a cardboard box and see whether an open, lower-sided bin shows enough. Often the height of the sides matters more than the material.
Turn labels and dates forward
This costs nothing and takes a few minutes. Turn every can, jar and box so the product name faces out. Where the package allows it, face the package date outward too, or write it on the front in marker, so the older one is easy to spot and use first.
Anything you cannot see through needs a label: opaque bins, baskets, canisters and any container holding food that resembles another, such as flours and sugars. The guide to pantry labels covers what to write and which label types hold up.
Label for the angle you look from
Where the label goes depends on where the item sits relative to your eyes.
- Above eye level: you see the front and the underside, never the top. Label the front of the bin or container, low down, in large letters. A label on the lid is invisible from below.
- At eye level: the front label works. This is the easiest shelf, so give it the food you use most.
- Below eye level: you look down onto lids and into bins. Label the lid, or the top edge of the bin, and keep bin sides low enough to see over.
Use the door for small flat things
Packets, pouches and sachets are the items most likely to vanish on a shelf. They slide under and behind everything else. A shallow rack on the back of the pantry door holds them one layer deep, face out, where nothing can sit in front of them.
Keep door storage to light items, check that the door still closes against the shelves, and follow the rack’s installation instructions and stated load rating.
Fix the lighting
Many pantries are lit by the room behind you, which means your own shadow falls across the shelves. A pantry with poor light hides its back half no matter how well it is arranged.
The simple fix is a battery-powered stick-on light under a shelf or inside the door frame. Many are motion-activated, so they come on when the door opens. Put one above the darkest shelf first and see whether it is enough before adding more.
Good to know
Anything wired, including a new ceiling fixture or hardwired strip lighting, is a job for a qualified electrician. Battery-powered stick-on lights need no wiring and can be moved if the first position does not work.
The ten-second test
To check your work, ask someone who does not stock the pantry to find the rice. If they can do it in about ten seconds without moving anything, the pantry is visible. If they open two bins and shift a row, you have found the next thing to fix.
Being able to see everything also makes it easier to track what you have. Once the shelves read clearly, a simple list becomes quick to keep, as described in pantry inventory basics.
Frequently asked questions
How can I see what is at the back of a pantry shelf?
Keep each row one item wide with identical packages behind each other, so the front package stands for the row. Raise back rows of small items on a tiered riser, and add a battery-powered stick-on light if the back of the shelf is in shadow. Removing excess items helps most.
Are clear containers better than opaque bins?
Clear containers and bins let you see what you have and how much is left, which suits dry goods you restock often. They also show mess, so untidy categories such as snack bags can look better in a labeled opaque bin. Many pantries use both, with every opaque bin labeled.
Where should I put labels so I can read them?
It depends on the shelf height. Above eye level, label the front of the bin near the bottom, because you cannot see the lid. Below eye level, label the lid or top edge, because you look down on it. At eye level, a front label is enough.