Organizing Canned Goods: Rows, Risers and Rotation
How to sort cans by type, choose between rows, risers, sloped racks and bins, keep older cans in front, and check condition as you go so duplicates stop piling up.

Cans are heavy, nearly identical in shape and very good at hiding behind each other. Stack them and the tower topples; push them to the back and you buy a fourth can of chickpeas because the first three were out of sight.
Organizing canned goods comes down to three decisions: how to group them, how to display them so each kind can be seen, and how to make sure the older cans are used before the newer ones. This guide takes them in that order, with a quick condition check along the way.
Sort by type first
Take every can out and group them on a table or counter before thinking about racks or risers. These groups suit most households as a starting point:
- Tomatoes: whole, diced, crushed, paste and sauce
- Beans and other legumes
- Vegetables
- Fruit
- Soup and ready meals
- Fish and meat
- Broth, stock and coconut milk
Merge or split the groups to match what you actually own. Then count. The size of each pile tells you how much shelf that type needs, and the duplicates show which cans you have been rebuying without knowing it.
Choose the right shelf
A shelf of cans weighs far more than a shelf of cereal boxes. Put canned goods on a sturdy shelf at or below the band between waist and eye level, where you can see the labels and lift a can without reaching overhead. Spare multipacks belong lower still, on the bottom shelf or in a crate on the floor.
If your shelving is adjustable or wall-mounted, check its stated load rating before filling a whole shelf with cans. Avoid stacking loose cans more than two high: a taller stack is unstable, and the bottom cans become the ones nobody uses.
Pick a spot away from the stove, oven and other heat sources. Cans do best somewhere cool and dry.
Ways to display cans
There is no single best method. Each of the following suits a different shelf and a different number of cans, and many pantries combine two.
Single-type rows
Line cans up front to back in rows one can wide, one kind per row. The front can tells you what the whole row holds, and a short row is an obvious prompt to restock. This costs nothing and suits shelves of ordinary depth.
Tiered risers
A tiered riser is a set of steps that lifts each row above the one in front, so every label shows. It suits a mixed collection where you own one or two cans each of many kinds. It needs clearance under the shelf above and gives up some capacity in exchange for visibility.
Can dispensers and sloped racks
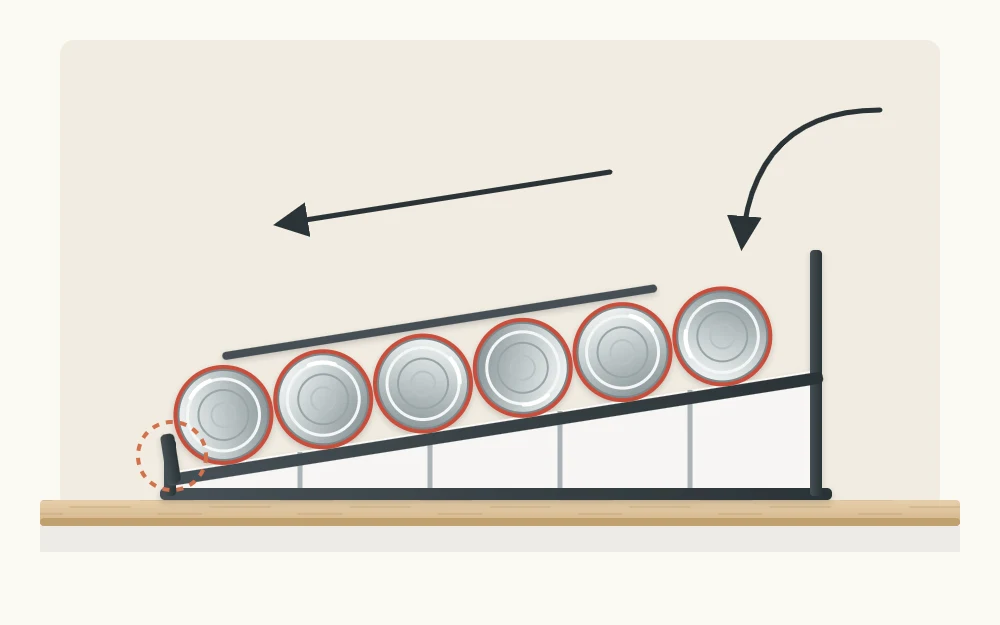
These hold cans on their sides on a slope. You load at the top or back, and when you take the front can, the next one rolls down to replace it. They suit cans you buy in quantity in one standard size, and they make rotation automatic.
Shallow bins by type
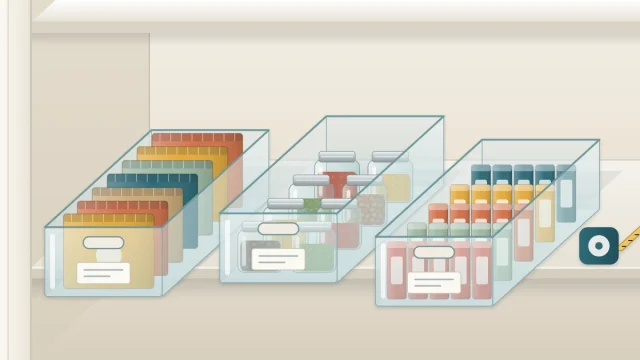
On deep shelves, a shallow bin for each type lets you slide a whole group forward at once. The guide to organizing deep pantry shelves explains why units that pull out beat loose rows when the shelf is deep.
A door rack for small cans
Small cans such as tomato paste and fish can live in an over-the-door rack, but only if both the door and the rack are rated for the weight and the rack is fixed according to its instructions. Keep large cans on the shelves.
| Method | Best when | Trade-off |
|---|---|---|
| Single-type rows | You buy several of the same can | Rows drift without a divider |
| Tiered riser | You own many kinds, few of each | Holds fewer cans per shelf |
| Sloped rack or dispenser | You stock one size in quantity | Fits standard sizes only |
| Shallow bins | Shelves are deep | You look down, so labels face up or forward |
| Door rack | Small, light cans | Depends on the door and rack rating |
If you are weighing up which of these to buy, the guide to pantry shelf organizers compares risers, racks and dividers in more detail.
Rotate: new cans behind, older ones forward
Whatever the display, the habit is the same. When you unpack groceries, slide the existing cans forward and put the new ones behind them, or under them if you have stacked two high. The can that has been in the pantry longest should always be the easiest one to pick up.
Turn the cans so the printed date can be found without a search, or write it on the lid with a marker if you store them in a bin and look down on them. The guide to food date labels and rotation covers the system for the whole pantry.
Check condition and dates as you sort
Sorting is the moment to look at each can, since you are handling them all anyway. According to the USDA’s Shelf-Stable Food Safety page, cans that are bulging, leaking, badly dented or heavily rusted should be discarded. The same page advises storing cans in a cool, dry place away from heat sources.
How long canned foods keep varies with the food. This site gives no figures of its own: read the date on the can and see that USDA page for guidance on storage times.
Good to know
A tidy row does not tell you anything about what is inside a can. Condition and the package date do, so check both whenever you reorganize and consult the USDA guidance when you are unsure.
Stop rebuying duplicates
Duplicates pile up when cans cannot be seen and when there is no limit. Two small rules deal with both.
- Set a ceiling per type. Decide how many cans of each kind your shelf and your cooking justify, perhaps the length of one row, and stop buying when the row is full, even during a sale.
- Look before you shop. A ten-second glance at the can zone, or a photo of it on your phone, shows which rows are short.
A quick order of work
- Empty the can shelf and sort by type.
- Check each can’s condition and find its date.
- Wipe and dry the shelf.
- Count each group and choose a display method that fits the shelf.
- Put the cans back with the oldest at the front of each row.
- Mark each row’s place with a shelf-edge label so the next person restocks it the same way.
Frequently asked questions
Is it okay to stack cans on top of each other?
Stacking two high is a reasonable limit for loose cans of the same size. Taller stacks tip easily and bury the bottom cans, which then get forgotten. If you need more height, a tiered riser or a sloped can rack uses the space while keeping every can reachable and in view.
Which shelf is best for canned goods?
A sturdy shelf at or below the band between waist and eye level, in a cool, dry spot away from heat sources. Cans are heavy, so keep large quantities low and check the stated load rating of adjustable or wall-mounted shelving before filling a whole shelf.
What should I do with dented or rusty cans?
The USDA's Shelf-Stable Food Safety page says cans that are bulging, leaking, badly dented or heavily rusted should be discarded. For anything you are unsure about, read that page before deciding. Checking each can as you sort is the easiest time to catch these.